
A leaky faucet can usually be fixed by identifying the faucet type, shutting off the water supply, and replacing the worn part inside, whether that is a washer, O ring, cartridge, or valve seat.
Our licensed plumbing team proudly serves homeowners across Oklahoma City with fast, reliable faucet leak repair when a do it yourself fix is not enough or the leak keeps coming back.
Why Faucets Start to Drip?
Most dripping faucets share a small number of root causes, and knowing which one applies to your sink makes the repair much faster.

Worn rubber washers. Inside a compression faucet, a washer presses against the valve seat every time you shut the water off. Constant pressure over the years causes the rubber to harden or wear down, which allows small amounts of water to pass through even when the handle is fully closed.
Corroded valve seats. The valve seat is the connection point between the faucet and the spout. Mineral buildup from hard water, which is common in many Oklahoma City neighborhoods due to the mineral content in local water, can slowly corrode this part and create a steady drip.
Damaged O rings. Small rubber O rings keep the connection between the faucet handle and the spout watertight. When an O ring loosens or wears thin, water tends to leak from the base of the handle rather than the spout itself.
Worn out cartridges. Modern single handle faucets rely on an internal cartridge to control water flow and temperature. Over thousands of uses, the cartridge can wear down and cause a consistent leak or a handle that feels loose.
Loose or clogged aerators. Sometimes the fix is even simpler than a full repair. A loose aerator or one clogged with mineral deposits can cause dripping, spraying, or reduced pressure at the tip of the faucet.
Tools You Will Need Before You Start
Having everything ready before you begin keeps the repair simple and quick.

- Adjustable wrench and a set of pliers.
- Flathead and Phillips screwdrivers.
- Replacement washers, O rings, or a cartridge kit matched to your faucet brand.
- Plumber’s grease.
- A small towel or rag and a sink stopper to protect the drain.
Step One: Identify Your Faucet Type
Fixing a leaky faucet starts with knowing what kind of faucet you have, since the internal parts and repair steps are different for each type.
Two separate handles usually point to a compression faucet, which requires multiple turns to shut off. A single lever that moves smoothly with a quarter turn is typically a cartridge faucet.
A single handle with a rounded cap and a side to side motion often indicates a ball faucet, common in many kitchen sinks. A crisp, short turn with a single lever usually signals a ceramic disc faucet.
Step Two: Shut Off the Water Supply
Turn the shut off valves under the sink clockwise until they stop, then turn the faucet handle on to release any remaining pressure in the line. If your home does not have individual shut off valves, or if they are difficult to turn, locate the main water valve near your water meter and shut it off there instead. Place a towel in the sink and close the drain so small parts stay within reach while you work.
Step Three: Repair Based on Faucet Type
Compression faucets. Remove the decorative cap, unscrew the handle, and use a wrench to loosen the packing nut. Lift out the stem and replace the seat washer along with the O ring, coating both with plumber’s grease before reassembly.
Cartridge faucets. Remove the handle, take out the retaining clip if present, and pull out the old cartridge. Slide in a new cartridge that matches your faucet’s brand and model, then reassemble the handle.
Ball faucets. After removing the cap and handle, unscrew the collar and lift out the ball assembly. Replace the rubber seats and springs underneath, along with any worn O rings, then reassemble and hand tighten the collar.
Ceramic disc faucets. Remove the cap and handle to access the cylinder, then unscrew the retaining nut and lift out the cylinder. Install a new cylinder in the same position and reassemble the faucet.
Once the new parts are in place, turn the water supply back on slowly and run the faucet for a few minutes to confirm the drip has stopped completely.
How Much Water a Small Leak Actually Uses?
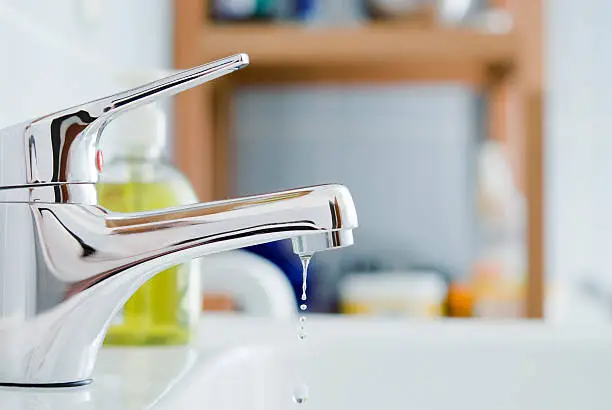
A faucet that drips at a steady rate can waste well over a hundred gallons of water in a single month. Over a full year, that adds up to real cost on your water bill, which is one of the best reasons to repair a leaky faucet as soon as you notice it rather than waiting.
When to Call a Licensed Plumber?
A faucet repair is a great weekend project for many homeowners, and our team is always glad to see you save time and money with a successful do it yourself fix. That said, a few situations call for a licensed professional.
If the leak continues after you have replaced the washer, O ring, or cartridge, there may be a deeper issue with the supply line or the faucet body itself.
Older homes across Oklahoma City sometimes have outdated valves or fittings that require specialized tools to service safely. If you are ever unsure about a step or you would simply rather have the job done right the first time, our licensed plumbers are ready to help with a fast, guaranteed repair.
Related: Plumbing Inspection Checklist for OKC Homes
Frequently Asked Questions
Can I fix a leaky faucet myself?
Yes, most faucet leaks can be repaired at home by identifying the faucet type, shutting off the water supply, and replacing the worn washer, O ring, or cartridge inside.
What is the most common cause of a leaky faucet?
A worn rubber washer inside a compression faucet is the most common cause, followed closely by a damaged O ring or a worn cartridge in single handle faucets.
How long does a faucet repair take?
A straightforward washer or cartridge replacement usually takes under an hour for an experienced plumber, and often less than that once the faucet type is identified.
Is a dripping faucet actually worth fixing?
Yes, a dripping faucet can waste a significant amount of water over time, which makes an early repair a smart way to protect both your water bill and your fixtures.